
Have you found empty gallon whiskey barrels lying in your garage or the corner of your garden? Don’t rush to toss them right away, because they offer a wealth of possibilities to elevate your outdoor space with a dash of vintage allure. These barrels, once used to age and mature the finest spirits, can be given a second life as captivating focal points and functional decor elements.
To infuse your home and garden with a timeless and storied appeal, let’s roll your sleeves and transform barrels into one-of-a-kind pieces.
This article contains affiliate links. If you purchase through them, I may earn a small commission at no extra cost to you. Thank you for your support!
#1. Whisky Barrel Planter
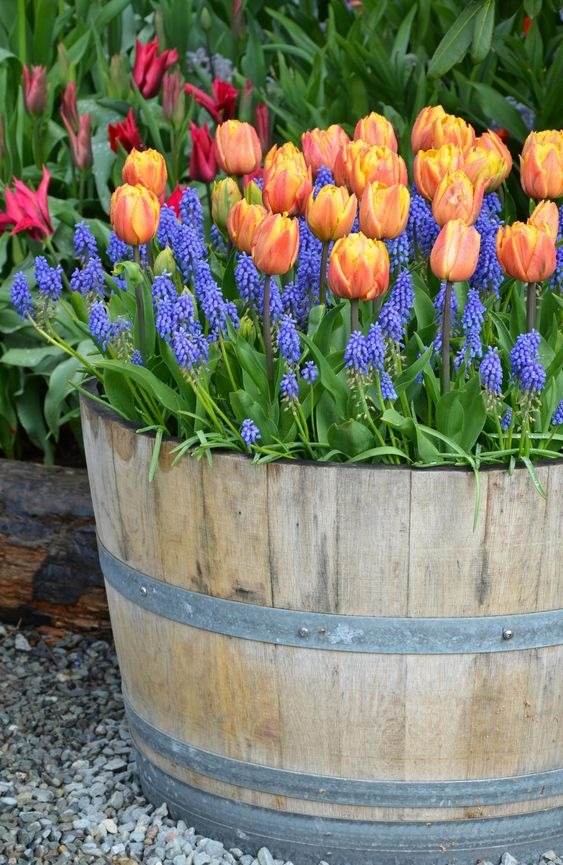
This whiskey barrel planter overflows with color, bringing spring straight to your doorstep.
Materials Needed
- 1 whiskey barrel planter (approx. 26″ diameter, 16″ high)
- Potting mix (2 cubic feet)
- Bulbs or nursery flowers (tulips, grape hyacinths, daffodils, or seasonal mix)
- Optional: coconut liner
- Drill and 1/2″ drill bit (optional)
Step-by-step Guide
Step 1: If the bottom of the barrel doesn’t already have holes, drill 5–6 evenly spaced drainage holes.
Step 2: Add a layer of rocks or gravel (about 2–3 inches) at the base for improved drainage.
Step 3: Fill the rest with high-quality potting mix, leaving about 2 inches from the top.
Step 4: Plant bulbs or arrange your nursery flowers, packing them snugly but not too tightly. Water generously and place in a sunny spot.
#2. Whisky Barrel Water Fountain
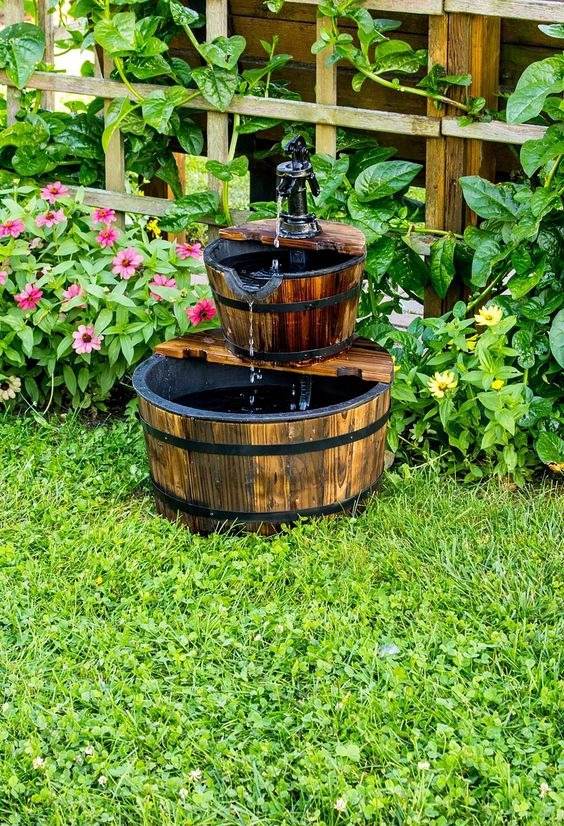
The gentle bubbling of water over the charred wood brings out the barrel’s natural history, it feels like a storybook scene come to life.
Materials Needed
- 1 whiskey barrel (approx. 15″ diameter) and 1 smaller barrel bucket (7–8″ diameter)
- Submersible fountain pump (GPH rating 120–200 recommended)
- Rustic water spout/faucet decor
- Clear vinyl tubing (½” diameter, about 4–5 ft)
- Sealer (optional)
Step-by-step Guide
Step 1: Seal the inside of the barrel(s) with waterproof sealer to prevent leakage. Let it cure for at least 24 hours.
Step 2: Place the submersible pump in the bottom barrel and run the vinyl tubing through the top bucket, securing it behind your decorative spout.
Step 3: Attach the upper bucket securely above the base (you can use stacked bricks, wood blocks, or a mounted stand inside the barrel).
Step 4: Fill the bottom barrel with water, plug in the pump, and enjoy your new rustic fountain.
#3. Whisky Barrel Bar Table
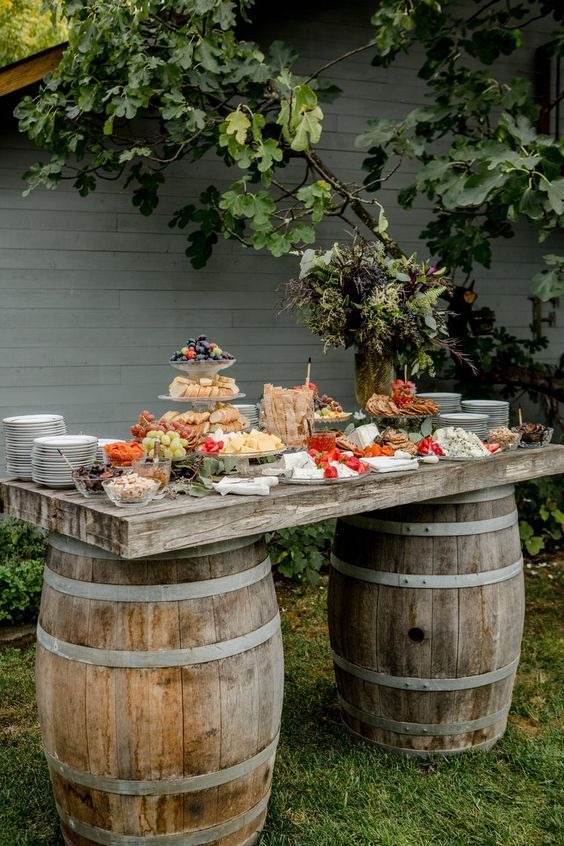
I built this for a fall gathering in our backyard, and everyone kept commenting on how timeless it looked.
Materials Needed
- 2 whiskey barrels (height approx. 35″, diameter 24″)
- 1 reclaimed wooden board (6 ft x 2 ft)
- Sandpaper
- Optional: wood stain
Step-by-step Guide
Step 1: Clean and sand the barrels to remove grime, but leave the rustic character if you love that aged look.
Step 2: Cut and sand the wooden top to your desired length and width. You can use pallet planks or a solid slab for a more farmhouse effect.
Step 3: Center the tabletop across the two barrels and secure with mounting brackets underneath if it will be permanent-or leave it loose for easy disassembly.
Step 4: Decorate your table with fruits or snacks to invite your guests.
#4. Whisky Barrel Ice Chest
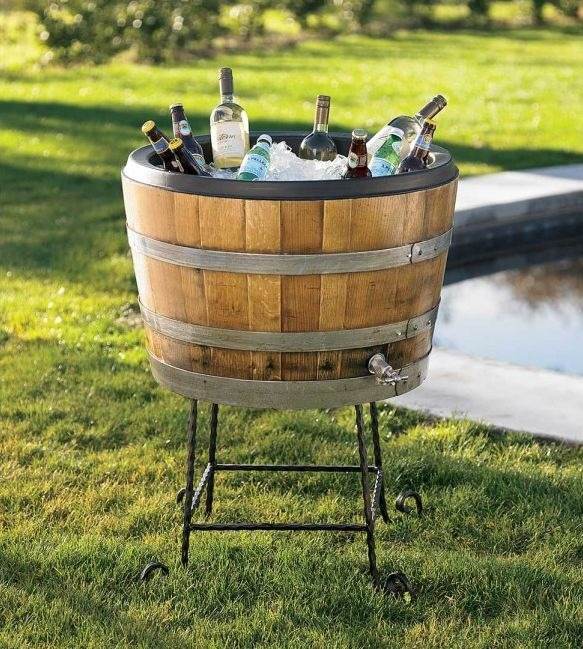
This cooler stole the show at our last summer BBQ. It’s more than a conversation starter, it’s practical, stunning, and ridiculously fun to roll out on a hot day.
Materials Needed
- 1 half-size whiskey barrel (cut height ~18–24″)
- 1 round plastic tub insert
- Outdoor beverage spigot kit
- Optional: metal stand
- Ice and your favorite drinks
Step-by-step Guide
Step 1: Cut the barrel in half horizontally if not already pre-cut. Sand the rim smooth to avoid splinters.
Step 2: Drill a hole at the base of the barrel for the spigot, following the spigot kit’s diameter guide. Insert and seal it with waterproof sealant.
Step 3: Insert the plastic tub inside the barrel for leak-proof insulation. Fill the gap around it with foam insulation spray if needed.
Step 4: Mount the barrel onto a metal stand to give it height and rollability. Fill with ice and drinks and let the party begin.
#5. Whisky Barrel Sink Vanity
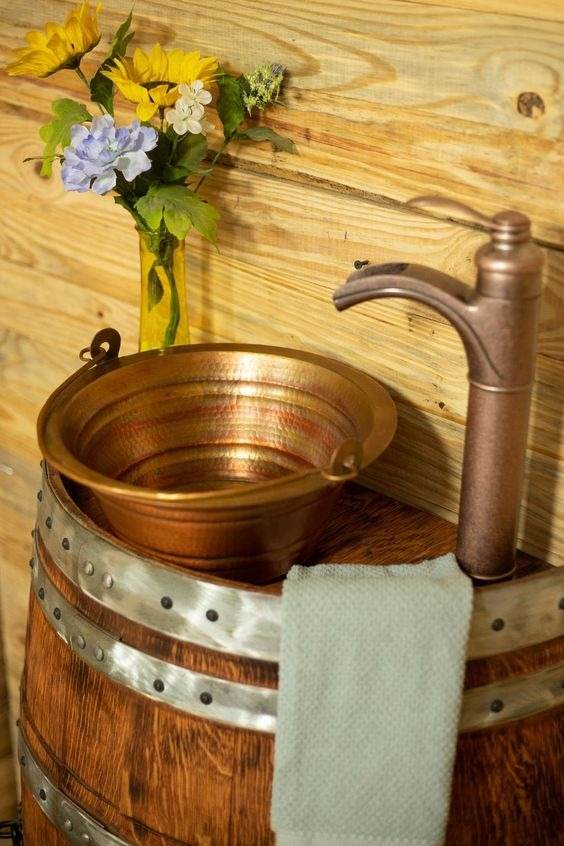
I wanted a sink that felt like it belonged in a garden shed or backyard bar.
Materials Needed
- 1 full-size whiskey barrel (approx. 35″ tall)
- 1 hammered copper bowl (diameter ~14–16″)
- 1 vintage-style faucet
- Hole saw
- Optional: drain pipe kit
Step-by-step Guide
Step 1: Mark the center top of the barrel and cut a hole slightly smaller than your basin’s diameter.
Step 2: Drop in the basin and mark where the faucet and drain will go. Drill/cut those openings accordingly.
Step 3: Mount the faucet onto the barrel top or nearby wall and connect to a water source if possible.
Step 4: Insert the basin, seal edges with waterproof adhesive, and attach the drain hose or pipe beneath.
#6. Whisky Barrel Fire Pit

There’s something about gathering around fire that just draws people in. You can build this barrel fire pit table for your patio, and it will be everyone’s favorite spot.
Materials Needed
- 1 sturdy whiskey barrel
- 1 round wooden tabletop, 36″–48″ wide and 1 round wood base, 30”
- 1 compact gas fire bowl kit with propane hook-up
- Heat-resistant glass rocks or lava rocks
- Basic wood sealant and fireproof adhesive
Step-by-step Guide
Step 1: Center and cut a circular hole in your tabletop to snugly fit the fire bowl insert.
Step 2: Attach the tabletop securely to the top of the barrel using corner brackets or wood screws from underneath.
Step 3: Place the fire bowl insert into the tabletop and fill it with glass or lava rocks.
Step 4: Connect the propane source and test for leaks before lighting. Add stools and enjoy your new fire-side gathering spot.
#7. Barrel Wine Rack
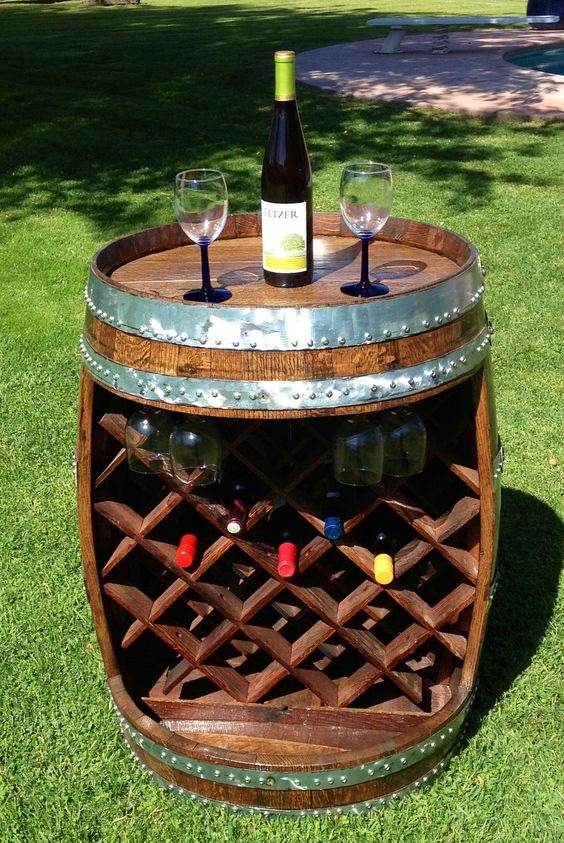
With its built-in cross-rack for bottles and smooth tabletop for glasses, it’s both charming and wildly practical, ideal for anyone who wants their wine within arm’s reach on summer evenings.
Materials Needed
- 1 whiskey barrel (standard 35″ height, 24″ diameter)
- 18 ft of 1″x2″ cedar wood slats
- Sandpaper
- Wood stain
- Electric jigsaw and drill set
- Wood glue and screws (¾ inch)
- Optional: 4 stemware holders
Step-by-step Guide
Step 1: Cut out a large front-facing section from the barrel using a jigsaw, preserving the structure. Sand all edges smooth to prevent splinters.
Step 2: Measure the inside and build an X-grid rack using the 1″x2″ wood slats, cut diagonally and notched to fit like lattice. Secure with glue and a few wood screws.
Step 3: Lightly sand the entire barrel and stain it evenly. Allow to dry, then coat with two layers of polyurethane sealant for weather protection.
Step 4: Attach optional under-shelf glass holders inside the top rim. Finally, set it upright, place your favorite wine.
#8. Barrel Pet Bed
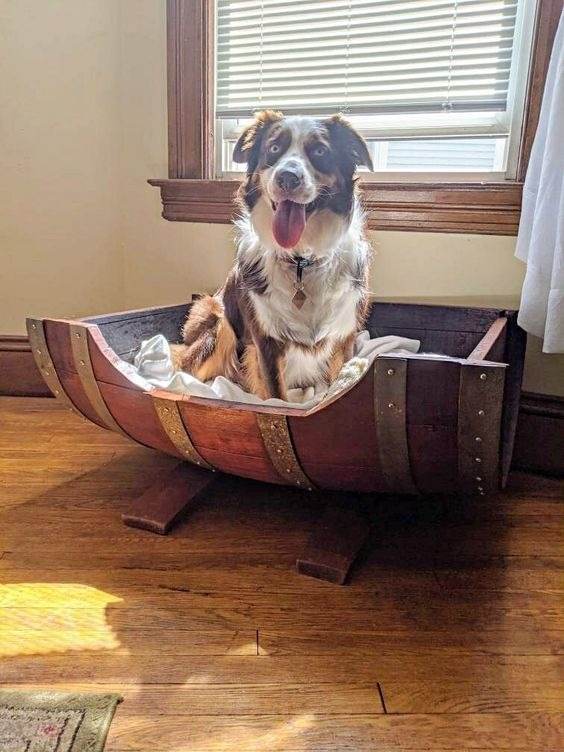
Turning a discarded whiskey barrel into this dog bed was one of the most heartwarming projects I’ve done.
Materials Needed
- 1 whiskey barrel (standard 35″ height × 24″ diameter)
- 2 wooden planks (approx. 18″ long × 3″ wide)
- 1 qt of wood stain
- 1 qt of polyurethane sealant
- 1 dog bed cushion
- Sandpaper
- Electric saw, drill, screws (1½”)
- Optional: brass brackets
Step-by-step Guide
Step 1: Cut the whiskey barrel in half lengthwise using a circular saw. Sand the inside and outside thoroughly until smooth.
Step 2: Stain the wood to bring out the grain and match your decor. Let it dry fully before sealing it with polyurethane.
Step 3: Cut and attach two wooden planks as legs underneath the barrel base. Secure with screws and wood glue for added strength.
Step 4: Place a soft cushion or foam bed inside.
#9. Barrel Cabinet
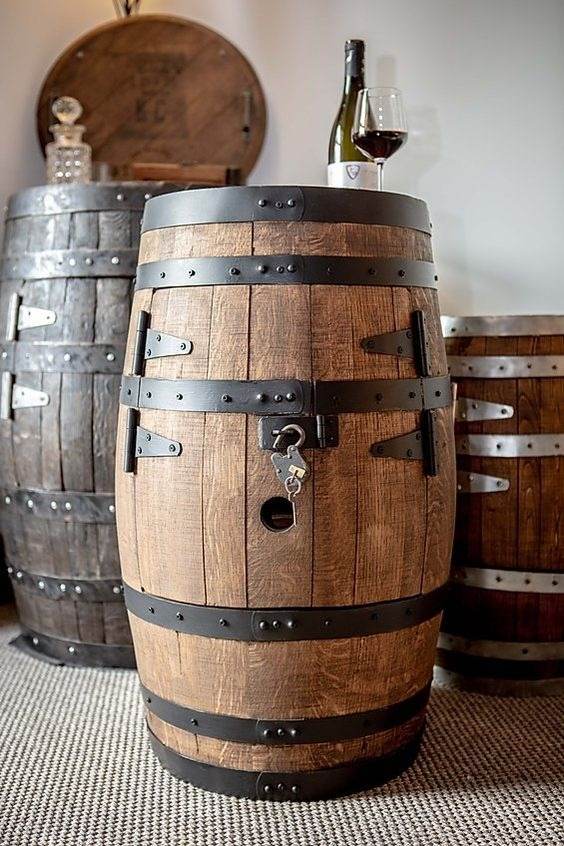
Whether it’s for storing spirits or simply as a conversation piece, this mini bar cabinet feels bold, practical, and full of soul.
Materials Needed
- 1 whiskey barrel (approx. 35″ height × 24″ diameter)
- 2 barrel door hinges
- 1 locking hasp with vintage key
- 2 interior shelves cut to 20″ diameter, ¾” plywood or oak
- 1 qt of wood stain
- 1 qt polyurethane clear coat
- Sandpaper
- Electric jigsaw, drill, screws (1½”), measuring tape
Step-by-step Guide
Step 1: Sand the barrel surface until smooth, removing any rough patches or splinters. Stain and seal the outside and let it dry for 24 hours.
Step 2: Using a jigsaw, cut out two vertical door panels on the front. Sand the edges clean and attach them back with metal barrel hinges.
Step 3: Install two interior circular shelves by securing them with wood brackets or mounting hardware. Make sure to leave space for bottles or glasses.
Step 4: Attach a hasp lock and key set to the doors, giving it a vintage, functional finish.
#10. Barrel Coffee Table
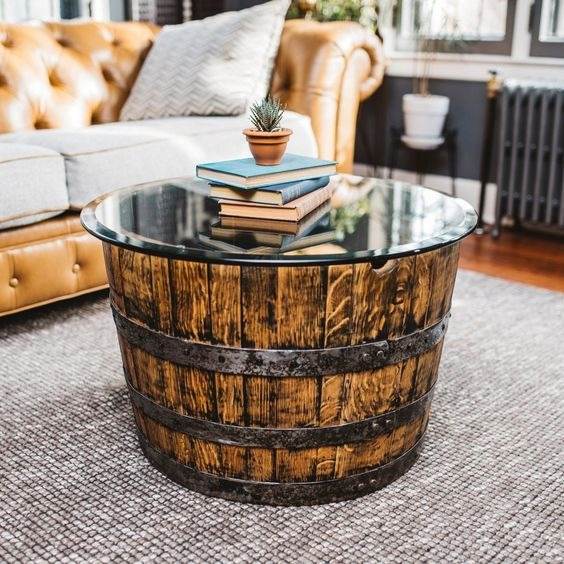
Materials Needed
- 1 whiskey barrel (approx. 18″ height × 24″ diameter)
- 1 round glass tabletop (30″ diameter × ½” thick)
- 4–6 rubber bumpers
- 1 qt of wood stain
- 1 qt of clear polyurethane sealer
- Sandpaper
- Drill, clamps, cleaning cloth
Step-by-step Guide
Step 1: Cut the whiskey barrel in half horizontally and thoroughly sand the exterior. Remove dust and wipe clean.
Step 2: Apply wood stain evenly with a brush or rag, then let dry fully. Apply a protective coat of polyurethane to seal the grain and prevent moisture damage.
Step 3: Once sealed, add rubber bumpers or table grips evenly around the top edge of the barrel to prevent the glass from sliding.
Step 4: Gently place the glass tabletop on top. Make sure it’s centered and level before decorating it with books or small plants.